
I remember being thrown into the deep end when it came to using ArcPy. The manual tasks were racking up, the human errors in a long-winded workflow were being compounded by fatigue, and let me tell you, it took about 60-90 hours to complete one of the workflows, waiting for the output from one geoprocessing tool to feed into the next over and over again. I eventually whittled those 60+ hours down to 3 hours using ArcPy. It wasn’t an overnight success type of thing, the process was to take parts that were easy to script and whittling away at it over the course of around 6 months, scripting more and more until the task was automated from start to end. Here are the 5 things you should know to enhance your ArcPy adventure from the start.
#1 Syntax, using the Esri Documentation and how to call Geoprocessing tools using ArcPy
First up is the very basic calling/running a geoprocessing tool with ArcPy. You will generally see two conventions used. The first below is an older style and is replaced in the documentation, for the most part, by the second convention, but the internet is littered with examples and snippets using the first convention so don’t be alarmed or confused if you see people using one convention over the other. They both work just the same and as far as I am aware there is no plan to deprecate the first convention. I try and stick with the second convention but sometimes fall into the old habit of using the other one.
import arcpy

##~~CONVENTION 1~~##
## arcpy.ToolName_tooboxname()
arcpy.CreateFeatureclass_management()

##~~CONVENTION 2~~##
## arcpy.toolboxname.ToolName()
arcpy.management.CreateFeatureclass()
The Esri documentation is a fantastic resource for checking out the correct syntax for a geoprocessing tool. Take the Create Feature Class tool above for example, head over to the documentation at this link, and scroll down to the Parameters heading. You will see two tabs, one called Dialog and one called Python.
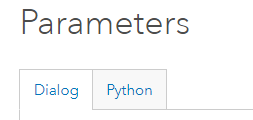
The Dialog tab describes the use of the tool if using direct from ArcGIS Pro via the GUI. Go ahead, click on in there to the Python tab! Here, you will find the syntax for the tool as per the image below, and also a description for each parameter.

Scroll down further to the Code sample section where you will find some code snippets showing the Create Feature Class tool in action. Most tools have this Code sample section in the documentation that can help provide an understanding on how to use the tool and spark some imagination.
#2 The Result Object
Staying with the Create Feature Class tool documentation page, just above the Code sample section there is a Derived Output section. This is what is returned from running the tool. Unbeknown to me for a long time was that each geoprocessing tool returns a Result object. Check out the documentation for the Result object here. Let’s show that by running the Create Feature Class tool and assigning to a variable that a Result object is returned.
>>> import arcpy
>>> out_path = r"E:\GIS_Admin\Data_Processing\APRX\Data_Processing.gdb"
>>> out_name = "ArcPy_Created_Feature_Class"
>>> geometry_type = "POINT"
>>> srs_id = 2157
>>> new_fc = arcpy.management.CreateFeatureclass(out_path, out_name, geometry_type, spatial_reference=srs_id)
>>> type(new_fc)
<class 'arcpy.arcobjects.arcobjects.Result'>
In the snippet above we assigned the running of the Create Feature Class tool to a variable called new_fc. We then used the in-built Python function type() to print the type of object our new_fc variable is, and it returned a Result object.
The best thing about the Result object is that it enables us to chain geoprocessing tasks, one after the other. Take a look below, if we just take a look at new_fc we can see it is a Result and we can use an index (or Result object getOutput method) to access the Derived Output from the Result object. Some tools, such as the Select Layer By Attribute tool return more than one Derived Output with the Result object. See the documentation for the Select Layer By Attribute tool here, and check out the Derived Output section.
Tip: you will often see people use Select tools and then use the Get Count tool to get the number of features selected, this is an unnecessary step as it is already available in the Result object.
>>> new_fc
<Result 'E:\\GIS_Admin\\Data_Processing\\APRX\\Data_Processing.gdb\\ArcPy_Created_Feature_Class'>
>>> new_fc[0]
'E:\\GIS_Admin\\Data_Processing\\APRX\\Data_Processing.gdb\\ArcPy_Created_Feature_Class'
>>> new_fc.getOutput(0)
'E:\\GIS_Admin\\Data_Processing\\APRX\\Data_Processing.gdb\\ArcPy_Created_Feature_Class'
In the snippet below we simply use the new_fc variable to successfully add a new field to the feature class. And again notice that a Result object was returned from using the Add Field tool.
>>> arcpy.management.AddField(new_fc, "New_Field", "TEXT", field_length=255)
<Result 'E:\\GIS_Admin\\Data_Processing\\APRX\\Data_Processing.gdb\\ArcPy_Created_Feature_Class'>
When calling geoprocessing tools with ArcPy always make sure to check out the documentation and get familiar with the Derived Output to aid with custom workflows using the Result object, it can help reduce the amount of code used.
#3 Copy Python Command
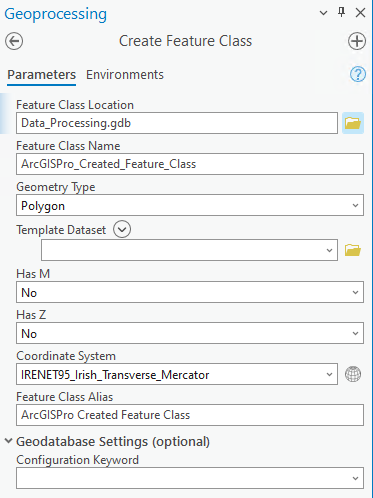
The Copy Python Command is an excellent way to see how you can supply the parameters for a tool using ArcPy. It is accessible after you have run a geoprocessing tool manually in ArcGIS Pro. Let’s check it out, take a look at the Create Feature Class geoprocessing tool parameters below in ArcGIS Pro (version 3.1.0)
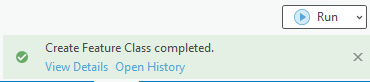
After clicking Run and getting the lovely green ribbon of success, click on the Open History link.
The History panel opens and you can see the history of the geoprocessing tools you have run, the latest at the top of the list.
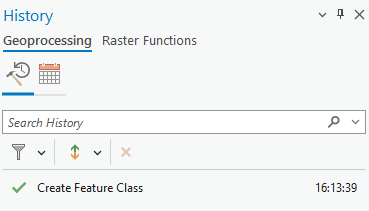
Right-click on the tool name and select Copy Python Command.

Open a Python editor (or a Notepad) and paste in the copied command. You can use this code snippet to perform the exact same action as you did with the GUI in ArcGIS Pro. One thing to note is that there can sometimes be more than one way to supply a value for a parameter. The spatial_reference parameter below is one of those, instead of what you see below we could simple pass 2157 (like we did in the Result object section), which is the EPSG code for the Irish Transverse Mercator projection. The Copy Python Command is an overall great way to get to grips with using parameters for various geoprocessing tools with ArcPy.
arcpy.management.CreateFeatureclass(
    out_path=r"E:\GIS_Admin\Data_Processing\APRX\Data_Processing.gdb",
    out_name="ArcGISPro_Created_Feature_Class",
    geometry_type="POLYGON",
    template=None,
    has_m="DISABLED",
    has_z="DISABLED",
    spatial_reference='PROJCS["IRENET95_Irish_Transverse_Mercator",GEOGCS["GCS_IRENET95",DATUM["D_IRENET95",SPHEROID["GRS_1980",6378137.0,298.257222101]],PRIMEM["Greenwich",0.0],UNIT["Degree",0.0174532925199433]],PROJECTION["Transverse_Mercator"],PARAMETER["False_Easting",600000.0],PARAMETER["False_Northing",750000.0],PARAMETER["Central_Meridian",-8.0],PARAMETER["Scale_Factor",0.99982],PARAMETER["Latitude_Of_Origin",53.5],UNIT["Meter",1.0]];-5022200 -15179500 10000;-100000 10000;-100000 10000;0.001;0.001;0.001;IsHighPrecision',
    config_keyword="",
    spatial_grid_1=0,
    spatial_grid_2=0,
    spatial_grid_3=0,
    out_alias="ArcGISPro Created Feature Class"
)
TIP! You do not even need to run the geoprocessing tool, simply fill in the parameters and use the dropdown arrow beside the Run button and select Copy Python Command.
#4 Environment Settings
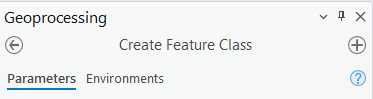
When you are running a geoprocessing tool in ArcGIS Pro you will see two tabs at the top of the Geoprocessing panel; Parameters and Environments, as per the image below for the Create Feature Class tool.
The Environments settings allow you to have extra control over the output. Check out the ones that are available for the Create Feature Class tool by clicking into the Environments tab.
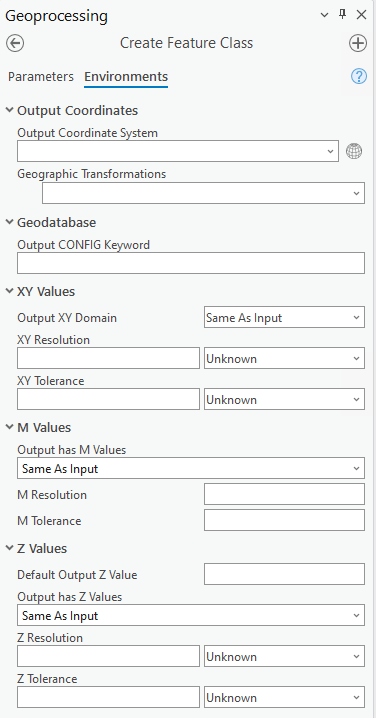
So, how do we control/set these with ArcPy? The Environments settings are exposed as properties through the arcpy.env class and you can find the properties at this link. We can control the output settings for the Create Feature Class tool above using the following.
## Output Coordinates
arcpy.env.outputCoordinateSystem = arcpy.SpatialReference(29902)

## Geographic Transfromations
arcpy.env.geographicTransformations = "TM65_To_ETRS_1989_1;IRENET95_To_ETRF_1989"

## Output CONFIG Keyword, can be used for enterprise geodatabases
# arcpy.env.configKeyword = "CONFIG_KEYWORD"

## Output XY Domain, only required for geodatabases pre-9.2
# arcpy.env.XYDomain = "-180 -90 180 90"

## XY Resolution - overwriting is not recommended
# arcpy.env.XYResolution = "0.002 METERS"

## XY Tolerance - overwritin is not recommended
# arcpy.env.XYTolerance = "0.002 METERS"

## Output has M values
arcpy.env.outputMFlag = "Same As Input"

## M Resolution
arcpy.env.MResolution = 0.001

## M Tolerance
arcpy.env.MTolerance = 0.001

## Default Output Z Value
arcpy.env.outputZValue = 10

## Output has Z Values
arcpy.env.outputZFlag = "Same As Input"

## Z Resolution
arcpy.env.ZResolution = "0.02 METERS"

## Z Tolerance
arcpy.env.ZTolerance = "0.02 METERS"
Aside from the tool Environments settings you can also use ArcPy to control some of the general geoprocessing settings. In ArcGIS Pro go to Project > Options > Geoprocessing.
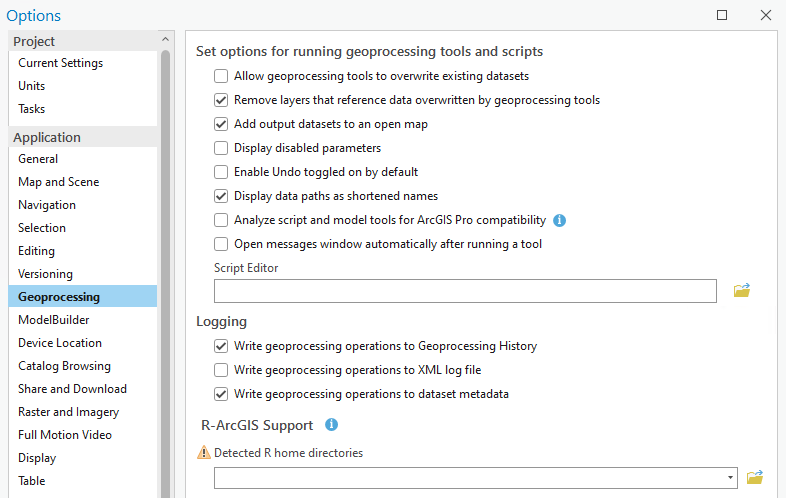
Below, we will enable overwriting an existing dataset, and automatically adding the output to an open map (if script is run within ArcGIS Pro)
## Allow geoprocessing tools to overwrite existing datasets
arcpy.env.overwriteOutput = True

## Add output datasets to an open map
arcpy.env.addOutputsToMap = True
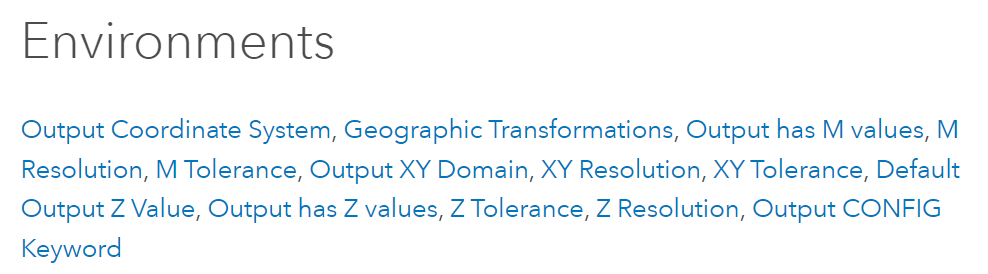
Two things to quickly wrap up this section, the first is how do you know which Environments can be used for each tool? Check out the documentation for each tool. If You reopen the documentation for the Create Feature Class tool and scroll down you will find a section called Environments.
The second and last is the workspace property.
## set the workspace
arcpy.env.workspace = r"path\to\workspace"
The workspace property enables you to use dataset names rather that the full dataset filepath as per below. The Rivers_of_Ireland feature class is in the workspace set in the arcpy.env.workspace property and the output_fc will be placed in the same workspace (Folder, File Geodatabase, Enterprise Geodatabase for examples).
input_fc = "Rivers_of_Ireland"
output_fc = "Subset_of_Rivers"

arcpy.conversion.ExportFeatures(input_fc, output_fc, "field_name = 'value'")
#5 The Memory Workspace
The memory workspace will single-handedly speed up and enhance the efficiencies with ArcPy, especially when meddling with chaining multiple geoprocessing tasks together. Let’s think about the normal process for chaining geoprocessing tasks…we run one tool and wait for the output to write to disk, we then run another and wait for it to perform a manipulation of the data on disk or write out to another dataset, and this can go on and on repeatedly for many steps until we reach our final output. We have left a trail of intermediary outputs in our wake, we’ve all been there, we promise ourselves to stick to good naming and delete what’s not required but we end up doing none of these.
Let’s take a look at storing the intermediary datasets in the memory workspace instead of outputting each to disk. In the example below we will take a feature class and load it into the memory workspace using the Export Features tool. Once in memory it is a separate dataset and any manipulations do no affect the original input dataset. We will then perform a Clip, followed by a Dissolve, and then use the Add Field tool to add a new field before we run the Calculate Field tool. Our last step is to export the feature class from memory to disk.
import arcpy

## set the workspace
arcp.env.workspace == r"path\to\workspace"

## input dataset name
input_fc = "Rivers_of_Ireland"
## the area we wich to clip to
clip_area = "AOI"
## output dataset set
output_fc = "Subset_of_Rivers"
## Name of new field to create
new_fld = "Length_KM"

## export input_fc into a feature class in memory workspace
memory_fc = arcpy.conversion.ExportFeatures("memory", "temp_fc")

## clip the dataset
memory_clip = arcpy.analysis.Clip(memory_fc, clip_area, "memory\\clip_fc")

## good practice to delete from the memory workspace anything that is not needed
arcpy.management.Delete(memory_fc)

## dissolve the rivers based on a common attribute (Code_Field name used for example)
memory_dissolve = arcpy.analysis.PairwiseDissolve(memory_clip, "memory\\dissolve_fc", "Code_Field")

## good practice to delete from the memory workspace anything that is not needed
arcpy.management.Delete(memory_clip)

## add a field to the dissolve feature class
arcpy.management.AddField(memory_dissolve, new_fld, "FLOAT")

## claculate the newly added field
arcpy.management.CalculateField(memory_fc, new_fld, "round(!Shape_Length!/1000, 2)", "PYTHON3")

## save the output to disk (this is our only disk save for this process)
arcpy.conversion.ExportFeatures(memory_dissolve, output_fc)

## good practice to delete from the memory workspace anything that is not needed
arcpy.management.Delete(memory_dissolve)
We performed a chained geoprocessing workflow in the memory workspace and only output the final dataset as needed.
Some cautions from the Esri documentation that you can find here.

Subscribe to never miss out…
I hope you have found this post useful and welcome any comments below that are ArcPy related that helped you when you started or you wish you knew before you started!